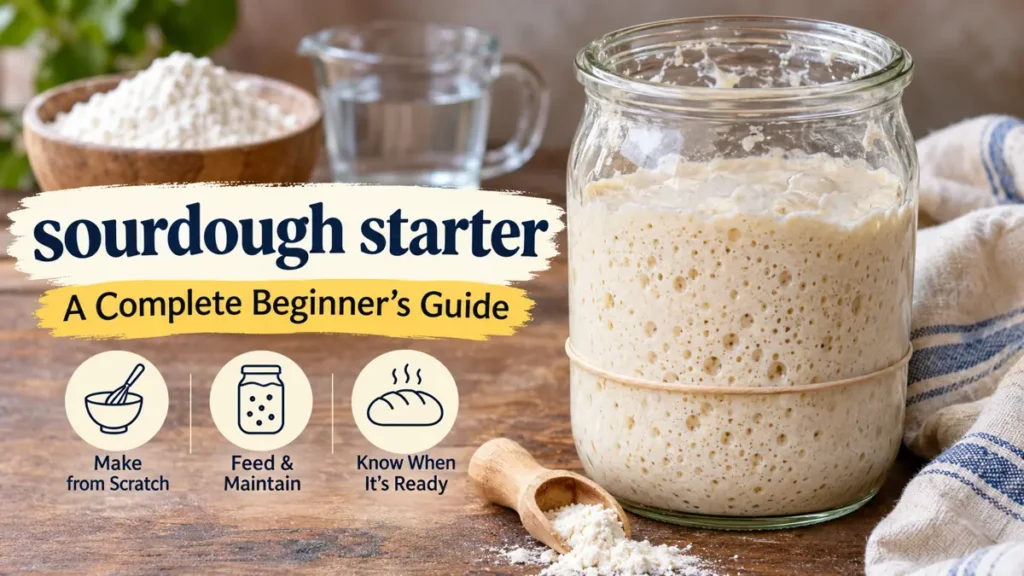
A jar of flour and water can become the foundation of homemade sourdough bread. The challenge is knowing what to do when it starts bubbling, stops rising, or develops an unfamiliar smell.
Making a sourdough starter is straightforward, but building a reliable culture takes patience. You don’t need commercial yeast, expensive equipment, or professional baking experience. You need flour, water, a suitable container, and a consistent feeding routine.
A sourdough starter is a fermented mixture of flour and water containing naturally occurring wild yeast and lactic acid bacteria. These microorganisms produce the gas and acids that help sourdough bread rise and develop its characteristic flavor. Most starters take approximately 5–14 days to become consistently active, depending on temperature, flour, and feeding conditions. King Arthur Baking+1
This guide explains how to create your first starter, recognize healthy fermentation, maintain it with minimal waste, and troubleshoot problems before baking.
What Is a sourdough starter and How Does It Work?
A sourdough starter is a living fermentation culture used to leaven bread naturally. Unlike commercial baker’s yeast, which consists of selected yeast strains, a traditional starter contains a community of wild yeasts and bacteria.
When flour and water are combined, microorganisms associated with the flour and surrounding environment begin using available nutrients.
Two groups play particularly important roles.
Wild yeast and carbon dioxide production
Wild yeasts consume available sugars and produce carbon dioxide and other fermentation byproducts.
The carbon dioxide creates bubbles in the starter and eventually helps bread dough expand. In wheat bread, the gluten network traps much of this gas, contributing to a lighter crumb.
A healthy starter usually increases in volume after feeding because its yeast population is actively fermenting.
Lactic acid bacteria and sour flavor
Lactic acid bacteria, often abbreviated LAB, produce organic acids during fermentation.
These acids contribute to the tangy flavor associated with sourdough and create an increasingly acidic environment.
A sufficiently established acidic culture helps discourage many undesirable microorganisms. Colorado State University Extension explains that acid production is an important part of sourdough starter safety. CSU Extension+1
The balance between yeast activity, bacterial fermentation, flour selection, temperature, and feeding frequency determines how a starter behaves.
Sourdough starter vs. commercial yeast
| Feature | Sourdough starter | Commercial yeast |
|---|---|---|
| Microorganisms | Wild yeasts and bacteria | Selected yeast strains |
| Main ingredients | Flour and water | Manufactured yeast |
| Fermentation | Generally slower | Generally faster |
| Flavor | Often complex and tangy | Usually milder |
| Maintenance | Regular feeding required | Stored until needed |
| Bread rising | Natural fermentation | Yeast fermentation |
Neither method is universally better. Commercial yeast offers speed and predictability, while sourdough fermentation creates distinctive flavors and allows bakers to maintain their own culture.
Ingredients and Equipment Needed to Make a sourdough starter
You can begin with two ingredients and a few ordinary kitchen tools.
Choosing the best flour
Different flours influence how quickly a starter develops and how it behaves after feeding.
| Flour type | Characteristics | Best use |
|---|---|---|
| Whole wheat flour | Contains bran, minerals, and nutrients | Starting a new culture |
| Whole rye flour | Often supports vigorous fermentation | Starting or reviving sluggish cultures |
| Unbleached all-purpose flour | Accessible and consistent | Everyday feeding |
| Bread flour | Higher protein content | Regular maintenance and bread baking |
| Bleached all-purpose flour | Can work, though results may vary | Alternative when other flour is unavailable |
Whole wheat and rye flour are particularly useful during the early stages because they supply nutrients and microorganisms that encourage fermentation.
King Arthur Baking recommends beginning with whole-grain flour and then switching to unbleached all-purpose flour for regular feedings. King Arthur Baking+1
You can also use a mixture of whole wheat and white flour if you prefer.
What kind of water should you use?
Ordinary potable tap water usually works.
If your water has a strong chlorine smell or your starter repeatedly struggles, try filtered water.
Water temperature also matters. Cool water slows fermentation, while warmer water can encourage activity in a cold kitchen.
Avoid excessively hot water because high temperatures can damage or kill the microorganisms you are trying to cultivate.
Essential equipment
You will need:
- A clean glass jar or food-grade container, approximately 500 mL to 1 liter.
- A digital kitchen scale that measures grams.
- A spoon or spatula for mixing.
- A loose-fitting lid or breathable covering that prevents contamination.
- A rubber band or marker to track the starter’s height.
- A comfortable, stable location away from direct sunlight.
A straight-sided glass jar is especially useful because you can easily see bubbles and measure how much the starter rises.
Stainless steel utensils and containers are also suitable. The idea that all metal automatically harms sourdough starter is a misconception.
How to Make a sourdough starter From Scratch: Day-by-Day Instructions
The following small-batch method uses a 1:1:1 feeding ratio by weight once daily feeding begins.
That means one part existing starter, one part fresh flour, and one part water.
Basic starter feeding formula
Equal weights
50 g
Starter
50 g
Flour
50 g
Water
The resulting mixture weighs 150 g and has 100% hydration, meaning equal flour and water weights.
The timeline is a guide, not a guarantee. Some starters become dependable within a week, while others require two weeks or longer.
Day 1: Mix flour and water
How to make a white flour sourdough starter | Sourdough.help
- Place 50 g whole wheat or whole rye flour into a clean jar.
- Add 50 g water.
- Stir until no dry flour remains.
- Scrape down the sides.
- Cover loosely and leave at approximately 21–26°C (70–79°F) for 24 hours.
The mixture should resemble thick batter or a soft paste.
Mark its starting height with a rubber band.
You might notice a few bubbles during the first day, but no visible activity is equally normal.
Day 2: Discard and feed
After approximately 24 hours:
- Keep 50 g of the original mixture.
- Discard the remainder.
- Add 50 g unbleached all-purpose flour.
- Add 50 g water.
- Mix thoroughly and cover loosely.
Leave the jar at room temperature for another 24 hours.
Some starters rise dramatically on day two. This early burst of activity can come from temporary microbial populations rather than a mature, stable sourdough culture.
An impressive early rise does not necessarily mean the starter is ready for bread.
Day 3: Observe fermentation
How to Make a Sourdough Starter in 7 Days | proofit
By the third day, you may notice:
- Small bubbles along the glass.
- A fruity, mildly sour, or unusual fermented smell.
- A change in texture.
- Some expansion after feeding.
Repeat the previous feeding: retain 50 g starter and add 50 g flour plus 50 g water.
If the mixture is actively rising and falling within 12 hours, begin feeding approximately twice daily.
If it remains quiet, continue observing and feeding according to its activity rather than assuming it has failed.
Days 4–5: Establish a feeding rhythm
Continue the 1:1:1 feeding process.
For an active starter at room temperature, feed about every 12 hours. A slower culture may not yet need that frequency.
At this stage, the starter might appear less active than it did on day two.
This temporary quiet period is common as the microbial community changes.
Look for gradual improvements in aroma, bubbling, and the amount of rise after each feeding.
Do not judge success by a single feeding.
Days 6–7: Check for consistent growth
A developing starter should begin showing more predictable activity.
Signs of progress include a rounded or domed surface, bubbles throughout the mixture, and a noticeable increase in volume.
A well-established starter often doubles within approximately 6–8 hours after a standard feeding under favorable conditions.
If yours has not reached this stage, continue feeding and monitoring.
King Arthur Baking emphasizes that starter readiness depends on reliable rising activity rather than a fixed number of days. King Arthur Baking
Days 8–14: Strengthen a slow starter
If your culture remains sluggish, give it more time.
Try maintaining a stable temperature around 24–26°C, replacing some white flour with whole rye or whole wheat flour, and avoiding excessive feeding before fermentation has progressed.
A young starter may need additional days to establish a stable balance of yeast and lactic acid bacteria.
Quick takeaway: A starter that reliably rises, peaks, and falls after feeding is more useful than one that simply reaches a particular age.
How to Feed and Maintain a sourdough starter
Once your starter becomes established, feeding keeps its microbial population supplied with nutrients.
You do not need to maintain a large jar of starter unless you bake frequently.
Understanding feeding ratios
Feeding ratios describe the weight relationship between existing starter, new flour, and new water.
| Feeding ratio | Starter | Flour | Water | Typical effect |
|---|---|---|---|---|
| 1:1:1 | 20 g | 20 g | 20 g | Relatively quick fermentation |
| 1:2:2 | 20 g | 40 g | 40 g | More food, generally longer until peak |
| 1:5:5 | 10 g | 50 g | 50 g | Larger refreshment, often slower to peak |
Higher feeding ratios supply more fresh flour relative to the existing culture.
They can be helpful in warm kitchens or when you need a longer interval before the starter reaches peak activity.
However, increasing the feeding ratio does not automatically repair a weak starter.
Maintaining starter at room temperature
Room-temperature storage works well for people who bake frequently.
A simple routine is to retain a small amount, feed it with fresh flour and water, and repeat when the culture has fermented sufficiently.
For many active starters, this means feeding every 12–24 hours, depending on temperature and feeding ratio.
Warm conditions accelerate fermentation and may require more frequent feeding.
How to store sourdough starter in the refrigerator
How to Store Sourdough Starter in Fridge
Refrigeration slows fermentation and reduces maintenance.
Wait until your starter is reliably established before switching to cold storage.
For routine refrigerated maintenance:
- Feed the starter.
- Allow fermentation to begin at room temperature.
- Cover the jar and refrigerate.
- Refresh approximately once per week.
South Dakota State University Extension recommends refrigerated storage only after the starter has developed an established microbial community. SDSU Extension
A mature starter may survive longer between feedings, but its strength can decline with extended neglect.
How to revive refrigerated starter
Remove the jar from the refrigerator and inspect it for contamination.
If it appears healthy, retain a small amount and feed it with fresh flour and water.
Allow it to ferment at a comfortable room temperature.
One feeding may be sufficient for a well-maintained starter, while a neglected culture may require several refreshment cycles.
Wait until it consistently rises strongly before using it in naturally leavened bread.
How to Tell When Your sourdough starter Is Ready for Baking
A bubbly surface alone does not prove that a starter can raise bread effectively.
The most useful indicators are predictable growth, fermentation aroma, and repeatable performance after feeding.
Sourdough Starter Cultures: Microbiology, Maintenance, Types & What Goes Wrong | Domson
Signs of a healthy, active starter
| Indicator | What to look for |
|---|---|
| Volume | Doubles after feeding |
| Timing | Often reaches double volume in 6–8 hours at a 1:1:1 feeding |
| Bubbles | Visible throughout the mixture |
| Aroma | Pleasantly sour, fruity, or yeasty |
| Texture | Aerated, stretchy, or sponge-like depending on flour |
| Consistency | Repeats the same growth pattern over several feedings |
These signs are more dependable when considered together.
A starter that rises strongly once but remains inactive during subsequent feedings may still be developing.
What is peak sourdough starter?
Peak starter is the stage when fermentation has produced its greatest volume before the mixture begins collapsing.
The surface may appear slightly domed, level, or just beginning to flatten.
At this point, the starter generally has substantial leavening activity.
Many bread recipes call for ripe or recently peaked starter because it provides predictable fermentation.
Does the sourdough starter float test work?
The float test involves placing a small spoonful of starter into water.
If it floats, the mixture contains enough trapped gas to remain buoyant.
However, floating is not a definitive test of fermentation strength.
A healthy starter can sink if it has been stirred, degassed, or made with a flour that produces a different texture.
Likewise, a bubbly but immature culture may float without being dependable for bread.
The rise test is generally more useful: mark the starter’s height after feeding and observe whether it doubles consistently.
Can you use starter before it doubles?
You can use a young or weak starter in recipes that include commercial yeast or do not depend on starter for significant rising.
However, naturally leavened sourdough bread generally requires a stronger culture.
Using an immature starter may produce dense bread, unpredictable proofing, and longer fermentation times.
Common sourdough starter Problems and How to Fix Them
Most starter problems relate to temperature, feeding frequency, hydration, or insufficient time for microbial development.
Not every unusual appearance indicates failure.
Why is my sourdough starter not bubbling?
A starter may remain inactive because the kitchen is cold, the culture is immature, or feeding conditions are inconsistent.
Try these adjustments:
- Maintain a steady temperature around 24–26°C.
- Include some whole rye or whole wheat flour.
- Use clean equipment and potable water.
- Avoid discarding and feeding repeatedly before a slow culture has had time to develop.
- Give a new culture sufficient time.
If the starter has no bubbles after several days, check its temperature and feeding routine before starting over.
Why does my starter rise and then fall?
Rising and falling is a normal fermentation cycle.
As yeast produces carbon dioxide, gas accumulates and expands the mixture.
Eventually, gas escapes and the structure weakens, causing the starter to collapse.
A visible line above the current mixture often indicates how high it previously rose.
If your starter repeatedly peaks long before the next scheduled feeding, consider feeding more frequently or using a higher refreshment ratio.
What does liquid on top of starter mean?
A layer of liquid, sometimes called hooch, can develop on an established starter that has gone without feeding.
It may appear grayish or brownish and smell alcoholic.
This often indicates that the culture has exhausted much of its available food.
If there are no signs of contamination, you can generally pour off the liquid or stir it back in before refreshing the starter.
Colorado State University Extension identifies alcoholic liquid as a possible normal fermentation byproduct. CSU Extension
However, fuzzy growth, unusual colored patches, or a putrid smell are not ordinary hooch.
Why does my sourdough starter smell like acetone?
A sharp smell resembling nail polish remover can occur when a starter becomes underfed or fermentation byproducts accumulate.
It may indicate that the culture needs more regular refreshment.
Try retaining a small amount and feeding with fresh flour and water.
If the smell improves and normal rising activity returns, the culture may recover.
An established starter can also smell fruity, vinegary, mildly alcoholic, or pleasantly sour.
When should you throw away sourdough starter?
Food safety takes priority over saving a culture.
Discard the entire starter if you notice:
- Fuzzy mold growth.
- Pink, orange, green, or other suspicious discoloration.
- A distinctly rotten or putrid smell.
- Clear signs of contamination.
Do not scrape mold from the surface and keep the remainder.
University extension food-safety guidance recommends discarding contaminated starter and thoroughly cleaning the container before starting again. SDSU Extension+2
Never taste raw starter to determine whether it is safe. Raw flour can contain harmful microorganisms, and fermented starter is not intended to be eaten uncooked.
Quick troubleshooting chart
| Problem | Likely explanation | Practical response |
|---|---|---|
| No bubbles | Cold or immature culture | Warm gently and continue feeding |
| Weak rise | Low activity or unsuitable feeding schedule | Adjust flour, timing, or temperature |
| Strong alcohol smell | Underfeeding | Refresh more regularly |
| Liquid layer | Extended fermentation | Feed if otherwise healthy |
| Starter rises too quickly | Warm conditions or insufficient fresh food | Increase feeding ratio |
| Starter too runny | High hydration or flour differences | Check weights and flour type |
| Pink or orange growth | Possible contamination | Discard completely |
| Fuzzy mold | Contamination | Discard and sanitize container |
Sourdough Starter Discard, Hydration, and Baking Uses
Maintaining a starter produces excess fermented flour and water unless you carefully control batch size.
Understanding discard and hydration helps reduce waste and improve recipe consistency.
What is sourdough discard?
Sourdough discard is the portion removed before feeding the remaining culture.
Discarding controls the total quantity of starter and ensures that the retained microorganisms receive enough fresh food.
Without removing some mixture, a starter would grow rapidly in size after repeated feedings.
For example, maintaining 50 g starter and adding 50 g each of flour and water produces 150 g.
At the next feeding, retaining only 50 g prevents the jar from continuously expanding.
Can you use sourdough discard in recipes?
Discard from an established, healthy starter can be incorporated into many cooked recipes.
Common examples include:
- Sourdough pancakes and waffles.
- Crackers and flatbreads.
- Pizza dough.
- Muffins and quick breads.
- Biscuits and savory baked goods.
Discard adds fermented flavor and contributes flour and water to the recipe.
However, it may not provide sufficient leavening strength on its own, particularly if it has been refrigerated or has passed peak activity.
Recipes using inactive discard often rely on baking powder, baking soda, or commercial yeast for additional lift.
Avoid using discard from the earliest stages of developing a new starter. University of California Agriculture and Natural Resources guidance recommends discarding it during the first two weeks while the culture establishes itself. UC Agriculture and Natural Resources
Understanding 100% hydration
Hydration expresses the weight of water relative to flour.
A starter containing equal weights of flour and water has 100% hydration.
For example:
\[ \text{Hydration}=\frac{50\text{ g water}}{50\text{ g flour}}\times100=100\% \]
This is the most common hydration level in beginner sourdough instructions.
A stiff starter contains proportionally less water, while a liquid starter contains more.
Hydration affects texture, fermentation behavior, and how starter contributes to bread dough.
How much starter should you use in bread?
The quantity depends on the recipe, fermentation schedule, and starter strength.
A simple example formula might use:
| Ingredient | Weight |
|---|---|
| Bread flour | 500 g |
| Water | 325 g |
| Active 100% hydration starter | 100 g |
| Salt | 10 g |
Because the starter contains 50 g flour and 50 g water, the dough has 550 g total flour and 375 g total water.
Its overall hydration is therefore approximately 68%.
This illustrates why bakers should account for the flour and water already present in their starter.
The amount of starter also influences fermentation speed. More ripe starter generally speeds up dough fermentation, while less starter often requires a longer rise.
Can you make sourdough starter without gluten?
Gluten-free sourdough starters can be made using suitable gluten-free flours, such as brown rice, buckwheat, or sorghum flour.
Their texture and fermentation behavior may differ from wheat-based starters.
A gluten-free culture also does not create the same gluten network that traps gas in conventional wheat bread.
Gluten-free bread recipes therefore often require additional structure-building ingredients.
For people with celiac disease, ordinary wheat sourdough is not gluten-free. Fermentation does not reliably eliminate gluten, and ingredients must be selected and handled to prevent cross-contact.
Long-Term sourdough starter Care and Practical Baking Tips
A mature starter can remain useful for years when it is properly maintained.
The goal is not to follow a rigid schedule indefinitely, but to understand how your culture responds to its environment.
Adjust feeding for your kitchen temperature
Temperature is one of the strongest influences on fermentation speed.
| Kitchen temperature | Expected behavior |
|---|---|
| Below 18°C (64°F) | Slow fermentation |
| 18–21°C (64–70°F) | Moderate to slow activity |
| 21–26°C (70–79°F) | Generally favorable for starter development |
| 27–30°C (81–86°F) | Faster fermentation; closer monitoring needed |
| Above 30°C (86°F) | Greater risk of overfermentation and excessive heat stress |
These are practical guidelines rather than exact biological boundaries.
In a warm kitchen, the starter may need a larger feeding or a cooler storage location.
In a cold kitchen, using slightly warmer water and a protected fermentation spot can help.
Avoid placing the jar in direct sunlight or near an uncontrolled heat source.
How to maintain a small sourdough starter
A small culture can be just as effective as a large one.
For example, maintain:
- 10 g existing starter.
- 20 g flour.
- 20 g water.
This produces 50 g of starter at a 1:2:2 feeding ratio.
When you need more for baking, increase the feeding quantities.
If a recipe requires 100 g of active starter, you could retain 20 g and add 50 g flour plus 50 g water, producing 120 g in total.
After fermentation, use 100 g for the recipe and retain 20 g for the next feeding.
This approach reduces unnecessary flour consumption while preserving the culture.
Can you dry sourdough starter for storage?
Yes. A mature starter can be dehydrated for longer-term preservation.
Spread a thin layer of healthy, active starter on a clean, suitable nonstick surface and allow it to dry completely under sanitary conditions.
Break the dried material into flakes and store it in a clean, dry, airtight container.
To reactivate it, rehydrate the flakes and provide fresh flour through successive feedings.
Revival time varies according to storage conditions and the health of the original culture.
Drying is useful as a backup, especially before extended travel or when sharing starter with another baker.
Common mistakes that slow starter development
New bakers often make the process more complicated than necessary.
One mistake is switching feeding schedules repeatedly before observing how the starter responds.
Another is keeping the jar in a location that alternates between very warm and very cold conditions.
Measuring flour and water by volume can also create inconsistent hydration because flour packs differently depending on how it is scooped.
A digital scale eliminates much of that variation.
Finally, do not assume that stronger sour flavor automatically means stronger rising power. Acidity and yeast activity are related but distinct characteristics.
A reliable starter needs both a healthy fermentation environment and sufficient leavening activity.
Final Thoughts on Making a sourdough starter
A healthy sourdough starter begins with flour, water, and consistent care. The early days may bring surprising bubbles, unusual smells, or periods of little visible activity, but these changes are often part of establishing a stable fermentation culture.
Focus on three things: maintaining a suitable temperature, feeding according to the culture’s activity, and tracking how reliably it rises after each refreshment.
Once your starter consistently doubles after feeding, develops a pleasant fermented aroma, and shows vigorous bubbling, it is ready to become the foundation of homemade sourdough bread.
Start with a small batch, record its progress each day, and allow the culture to develop at its own pace.