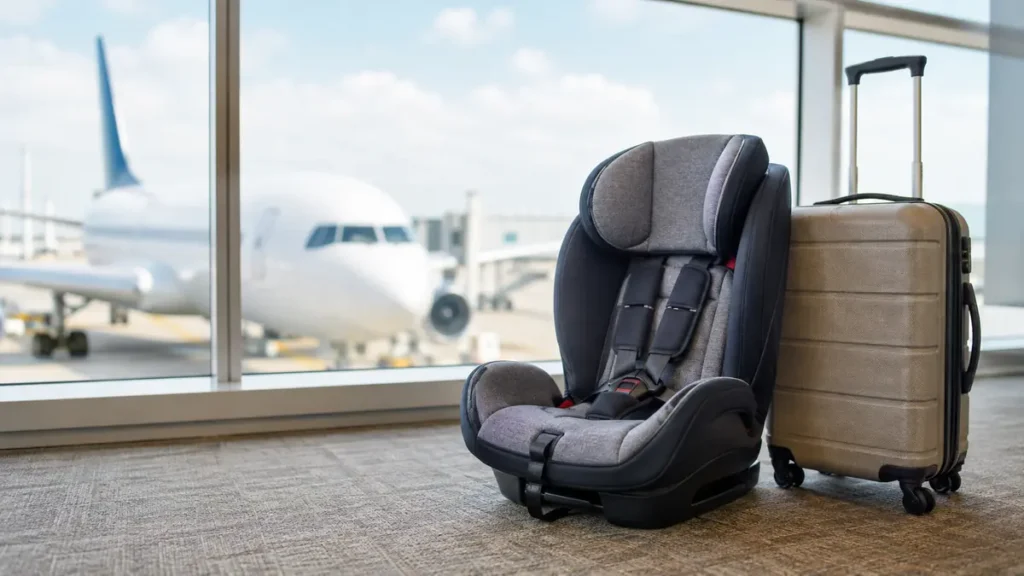
A family trip becomes complicated when the car seat that protects your child is also the largest item you need to carry. The wrong model can be difficult to install in rental cars, too wide for an airplane seat, or nearly impossible to manage through a busy airport.
A travel car seat is a child restraint selected for portability, easy installation, and compatibility with unfamiliar vehicles or aircraft. It must fit the child’s height and weight, meet applicable safety standards, and suit every transportation method on the itinerary. Lightweight construction is useful, but correct fit and installation remain more important.
What Is a travel car seat?
“Travel car seat” is a practical description, not usually an official regulatory category. It may be an infant carrier, convertible seat, forward-facing harnessed seat, or booster that is convenient to take away from home.
Models commonly described as travel-friendly have some combination of:
- Low overall weight
- A narrow shell
- Compact dimensions
- Simple seat-belt installation
- Aircraft certification
- A foldable frame
- Removable or minimal accessories
- A dedicated carrying bag or backpack
A portable child restraint is not automatically suitable for every situation. Some products work only in motor vehicles, while others—such as the CARES harness—are intended only for aircraft.
Approved lightweight seats must meet the same applicable safety standard as heavier seats in their category. In the United States, conventional child restraints are generally regulated under Federal Motor Vehicle Safety Standard 213, or FMVSS 213.
Choosing the Correct Restraint for Your Child
The right restraint depends primarily on the child’s height, weight, proportions, and developmental stage. Age ranges printed on product pages are only general guidance.
| Child’s stage | Appropriate restraint | Main consideration |
|---|---|---|
| Newborn or infant | Rear-facing infant or convertible seat | Correct recline and harness fit |
| Baby or young toddler | Rear-facing convertible seat | Remain rear-facing to the permitted limit |
| Older toddler or preschooler | Forward-facing seat with a harness and tether | Do not switch to a booster too early |
| School-age child | Belt-positioning booster | Requires a lap-and-shoulder belt |
| Older child | Vehicle seat belt | Use only when the adult belt fits properly |
The National Highway Traffic Safety Administration recommends keeping children rear-facing until they reach the highest height or weight permitted by their restraint. Once they outgrow that position, they should use a forward-facing seat with a harness and tether until reaching its limits.
Why rear-facing matters
During a crash, a rear-facing shell supports the child’s head, neck, and spine while distributing forces across the back of the restraint. Turning a child forward-facing simply because the minimum requirement has been reached gives up that additional protection.
For travel, avoid choosing a compact rear-facing seat that the child is about to outgrow. Check both the standing-height limit and the manufacturer’s rules concerning head clearance above the shell.
When is a child ready for a booster?
A child should move to a booster only after outgrowing the forward-facing harness and becoming mature enough to sit correctly for the entire journey.
A booster does not restrain the child independently. It positions the vehicle’s lap-and-shoulder belt across stronger areas of the body.
When can a child stop using a booster?
Use this five-step fit test:
- The child sits with their back against the vehicle seat.
- Their knees bend naturally at the seat edge.
- The lap belt lies across the upper thighs rather than the abdomen.
- The shoulder belt crosses the chest and shoulder without touching the neck.
- The child can maintain that position throughout the journey.
Many children still need a booster between ages 8 and 12. Belt fit can also change from one vehicle to another, so a child may pass the test in the family car but fail it in a taxi or rental vehicle.
How to Choose a travel car seat
Convenience should be evaluated only after confirming that the restraint fits the child and meets the required safety standards.
Check the complete size limits
Review the manufacturer’s limits for:
- Minimum and maximum weight
- Standing height
- Seated shoulder height
- Head position relative to the shell
- Rear-facing and forward-facing modes
- Harness-slot position
A child’s torso length can matter as much as overall height. Two children with the same standing height may fit differently in the same harnessed seat.
Compare width and front-to-back space
A narrow car seat is easier to accommodate on an aircraft and in compact rental cars. Measure the restraint at its widest fixed point, including permanent armrests and side-impact structures.
Width alone does not guarantee compatibility. A seat may still encounter problems caused by:
- Fixed aircraft armrests
- Long aircraft belt buckles
- Vehicle head restraints
- Deeply contoured vehicle seats
- Recessed seat-belt buckles
- Limited space behind the front passenger
Check the planned airline’s seat dimensions when they are available, but treat them as guidance rather than a guarantee.
Consider weight realistically
A seat that feels light in a bedroom may feel very different after a long airport connection. Think about who will carry it while also managing the child, stroller, hand luggage, and travel documents.
Common transport methods include:
- A car-seat backpack
- A rolling travel cart
- A manufacturer-approved carrying bag
- A strap that attaches the empty seat to luggage
- A stroller compatible with an infant carrier
Test the entire arrangement at home before departure. Walk with it, pass through a doorway, climb stairs, and confirm that you can remove the restraint quickly.
Prioritize uncomplicated installation
An easy-to-carry seat can still be a poor choice if its belt path is difficult to access. Families often need to install a restraint in an unfamiliar taxi while tired, under time pressure, or in poor lighting.
Useful features may include:
- Clearly marked belt paths
- Built-in seat-belt lock-offs
- Simple recline indicators
- Accessible harness adjusters
- Visible labels and diagrams
- Instructions stored on the restraint
- A no-rethread harness
NHTSA publishes ease-of-use ratings, but these ratings assess usability rather than crash performance.
Quick takeaway: Select the seat that fits the child, works throughout the itinerary, and can be installed correctly. Portability should make safe use easier—not require compromises.
Using a travel car seat on an Airplane
The Federal Aviation Administration says that the safest place for a child under two on a U.S. flight is in an approved child restraint system in their own ticketed seat, rather than on an adult’s lap.
During sudden turbulence, an adult may be physically unable to hold a lap infant securely. Purchasing a separate ticket is the only reliable way to guarantee that the child has a passenger seat where an approved restraint can be installed.
How do you know whether a car seat is aircraft approved?
For a conventional U.S. restraint, inspect the certification label. An approved model should carry wording stating that it is certified for use in motor vehicles and aircraft.
Locate this label before leaving home and photograph it. Airline staff may ask to inspect it during boarding.
Not every seat used legally in a car is approved for aircraft use. International certification markings also differ, so contact the operating airline—not only the company that sold the ticket—when traveling outside the United States or on a codeshare flight.
Where should the car seat be installed?
A child restraint is commonly installed in a window seat so it does not block another passenger’s access to the aisle. It cannot be placed in an emergency-exit row.
Other positions may be permitted if the restraint does not obstruct anyone’s evacuation route. Families traveling with multiple restrained children should contact the airline before departure.
Can a rear-facing seat be used on a plane?
Yes, provided the restraint is aircraft approved, the child remains within its rear-facing limits, and the installation follows the manufacturer’s instructions.
A rear-facing model may limit the recline of the seat in front. That inconvenience does not justify turning a child forward-facing before the restraint permits it.
How to install a car seat on an aircraft
Aircraft passenger seats normally provide a lap belt instead of a vehicle-style lap-and-shoulder belt.
- Review the car-seat instructions before boarding.
- Place the restraint in an airline-approved position.
- Route the aircraft lap belt through the correct belt path.
- Ensure the belt is not twisted.
- Buckle it and press down on the restraint.
- Pull the belt firmly until the installation is tight.
- Check for movement at the belt path.
- Secure the child using the internal harness.
The restraint should not move more than one inch from side to side or front to back when tested at its belt path.
Some aircraft buckles end up inside the belt path or behind the child. Practice both installation and removal before traveling so the buckle does not become trapped.
Can a booster seat be used on a plane?
A belt-positioning booster requires a lap-and-shoulder belt. Because standard aircraft seats have lap-only belts, conventional boosters generally cannot be used during taxi, takeoff, flight, or landing.
A booster may still be transported for use at the destination. Secure or pack any detachable components so they do not become lost.
What is the CARES harness?
The AmSafe Child Aviation Restraint System, commonly called CARES, is an FAA-approved aviation harness. FAA guidance identifies it for children weighing 22–44 pounds and measuring no more than 40 inches tall.
CARES is designed for aircraft. It does not replace a child restraint in a taxi, rental car, or rideshare, so families using it must make separate arrangements for ground transportation.
Travel Car Seat Installation in Rental Cars
An unfamiliar vehicle may have different seat belts, anchor locations, head restraints, and seating contours. Read both the car-seat instructions and the vehicle owner’s manual whenever possible.
Should you use the seat belt or lower anchors?
Either method can provide a safe installation when permitted and performed correctly. Do not use the vehicle belt and lower anchors simultaneously unless the car-seat manufacturer expressly allows it.
Seat-belt installation is particularly useful for travel because:
- Every standard seating position has a belt.
- Center seats may not have dedicated lower anchors.
- Lower-anchor locations can be difficult to find.
- Anchor weight limits apply.
- Aircraft installations use lap belts.
Determine how the vehicle belt locks. Some shoulder belts lock after being pulled completely out and slowly retracted. Other installations depend on a built-in lock-off or another manufacturer-approved method.
Use the one-inch test
After tightening the installation, hold the restraint at the belt path with your non-dominant hand. It should not move more than one inch in any direction.
Do not test a rear-facing seat by pushing its upper edge. Movement at the top of a rear-facing restraint is normal.
For a forward-facing installation, use the top tether whenever required and available. It reduces forward movement of the child’s head during a collision.
Adjust the harness correctly
The harness should:
- Lie flat without twists
- Pass through approved slots at or below the shoulders when rear-facing
- Pass through approved slots at or above the shoulders when forward-facing
- Be tightened until excess material cannot be pinched at the shoulder
- Have its chest clip positioned at armpit level
Do not secure a child while they are wearing a thick coat. Bulky clothing creates hidden space between the harness and the body. Buckle the child in normal indoor clothing, then place a coat or blanket over the harness.
Bringing Your Own Seat vs. Renting One
Rental-car companies frequently offer child restraints, but the available model, condition, and installation instructions may not be known until collection.
| Option | Benefits | Drawbacks |
|---|---|---|
| Bring your own | Familiar operation, known history, confirmed fit | Difficult to carry and protect |
| Rent from a car company | Less equipment through the airport | Availability and condition may vary |
| Reserve child-friendly transport | May simplify airport transfers | Requires careful provider verification |
| Purchase at the destination | New restraint with a known history | Safe transport is still needed before purchase |
The American Academy of Pediatrics advises parents to confirm that a rented seat suits the child’s age and size, appears to be in good condition, and includes its instruction manual.
Before accepting a rental restraint, check for:
- A readable model and manufacturing-date label
- Expiration
- Open recalls
- Missing harness components
- Cracks, deformation, or damaged foam
- Frayed webbing
- Food or debris inside the buckle
- Unapproved padding or accessories
- A known crash history
If the provider cannot supply an appropriate seat, a reservation alone does not make it safe to transport the child without one.
Using a Car Seat in Taxis and Rideshares
Taxi and rideshare exemptions vary by location. Even where the law provides an exemption, the laws of crash physics remain unchanged.
Bring a restraint that you can install quickly with a seat belt. Before the vehicle arrives:
- Keep the harness adjusted close to the child’s current size.
- Review the correct belt path.
- Place the child somewhere safe while installing.
- Ask the driver not to move until installation is complete.
- Perform the one-inch test.
- Confirm that no belt or harness strap is twisted.
Do not assume that Uber, Lyft, or a local taxi will provide a child restraint. Services that advertise car seats may operate only in selected cities and may restrict availability by child age or size.
Checking a Car Seat as Baggage
Airlines often transport child restraints without applying the normal baggage fee, but policies can change. Confirm the rules with the operating airline.
Using an approved seat in the cabin keeps the equipment under your control. Checked and gate-checked seats can be dropped, crushed, delayed, or lost.
If you must check the restraint:
- Remove loose accessories.
- Photograph its preflight condition.
- Put contact information inside and outside the bag.
- Use a protective bag that allows damage to be detected.
- Do not pack heavy objects inside the seat.
- Inspect the shell, harness, buckle, and foam after collection.
A padded travel bag protects against dirt and superficial damage, but it cannot guarantee that baggage handlers will not subject the restraint to a damaging impact.
Stop using the seat if you discover cracks, stress marks, missing components, deformation, or damaged energy-absorbing foam.
Road-Trip Safety and Car-Seat Breaks
Child restraints are designed for transportation, not as general sleep spaces after a journey. Plan regular breaks during long drives so children can leave the seat, move, feed, and receive care.
Newborns, premature babies, and children with respiratory or other medical concerns may require individualized travel advice from a pediatrician.
During a road trip:
- Check harness tightness at every stop.
- Monitor the vehicle temperature.
- Never leave a child unattended inside the car.
- Remove a sleeping infant from the restraint after arrival.
- Use a firm, flat surface intended for infant sleep.
- Never place a car seat on an elevated countertop, table, or bed.
- Avoid unapproved head supports and strap covers.
Only use inserts, padding, toys, mirrors, or accessories approved by the restraint manufacturer for that specific model. Unapproved products can affect harness fit or become projectiles during a crash.
Common Travel Car-Seat Mistakes
Choosing the lightest model without checking fit
A low-weight seat may have short harness limits or an awkward installation system. Saving a few pounds provides little value if the child has nearly outgrown the restraint.
Moving to the next stage for convenience
Do not turn a child forward-facing, replace a harness with a booster, or stop using a booster simply to reduce luggage. Each transition generally provides less protection and should occur only after the previous stage has been outgrown.
Assuming every travel device works everywhere
A travel vest, inflatable booster, folding seat, infant carrier, and aviation harness have different approved uses. Confirm whether the product is permitted in motor vehicles, aircraft, or both.
Using unapproved accessories
Generic harness pads, head supports, seat protectors, and buckle devices may interfere with performance. Use only components supplied or expressly approved by the manufacturer.
Forgetting to check recalls
Register the seat with its manufacturer and check the model number before every major trip. Recall campaigns may apply only to certain manufacturing dates, bases, or configurations.
Using a seat with an unknown history
Avoid secondhand restraints unless you can confirm the complete history, expiration, original parts, labels, instructions, and recall status.
NHTSA recommends replacing child restraints after moderate or severe crashes. Continued use after a minor crash depends on NHTSA’s criteria and the manufacturer’s instructions.
Relying only on destination law
Child-passenger laws differ between countries, states, and provinces. Legal minimums may also provide less protection than current safety recommendations.
Check official government guidance for the destination, including rules for rental cars, taxis, rideshares, front seats, and active airbags.
Pre-Travel Safety Checklist
Complete these checks before leaving home:
- Measure the child’s current height and weight.
- Confirm that the child fits within every relevant limit.
- Inspect the harness, buckle, shell, and foam.
- Verify the expiration date.
- Check for recalls.
- Register the seat with its manufacturer.
- Read and download the instruction manual.
- Photograph the certification and model labels.
- Confirm aircraft approval when flying.
- Review the operating airline’s policy.
- Measure the restraint at its widest point.
- Practice seat-belt installation and removal.
- Check child-restraint laws at the destination.
- Arrange appropriate ground transportation.
- Pack only approved accessories.
- Label the restraint and carrying bag.
- Allow extra time for airport security and boarding.
Families uncertain about installation can contact a certified Child Passenger Safety Technician. NHTSA’s Car Seat Inspection Finder lists in-person and virtual assistance options in the United States.
Final Thoughts on Selecting a travel car seat
The best travel car seat is not automatically the lightest, smallest, or most expensive model. It is the approved restraint that fits the child’s present size, works with the planned aircraft and vehicles, and can be installed correctly without makeshift solutions.
Before traveling, verify the seat’s limits, certification, expiration, and recall status. Practice installing it with a seat belt, confirm airline requirements, and plan how it will be carried. Careful preparation makes family travel easier while preserving the protection the restraint is meant to provide.